Do you walk by the hair sticks in Claire’s and wonder what folks do with them? Have you stuck them in your hair, chopstick-style, only to have them fall out again? Yeah, me too. In fact, I still don’t know how people accomplish hairstyles that require two sticks, but I’ve got a simple updo that I do with one.
Materials:
- Shoulder-length or longer hair
- Hair elastic (I prefer the clear, ouch-less, plastic variety)
- Sharp, pointy stick (you can use sticks intended for hair, or pencils, paintbrushes, shish kabob skewers, etc)
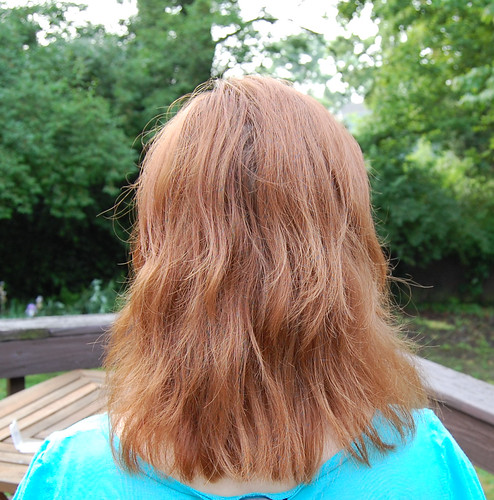
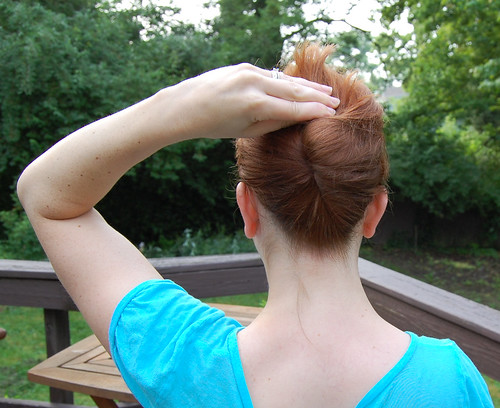
1. Start with your hair down.

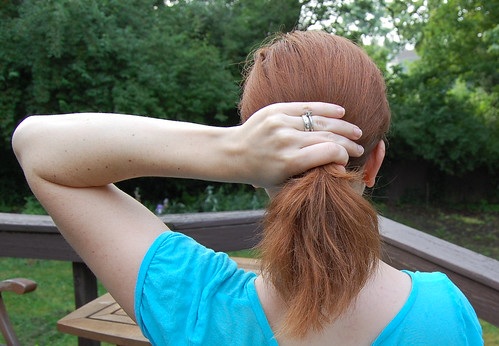
2. Pull it into a low ponytail.
3. Secure with an elastic.
4. Loosen the elastic so that there is slack between the elastic and your scalp.
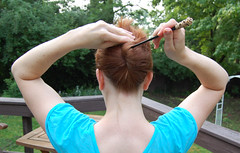
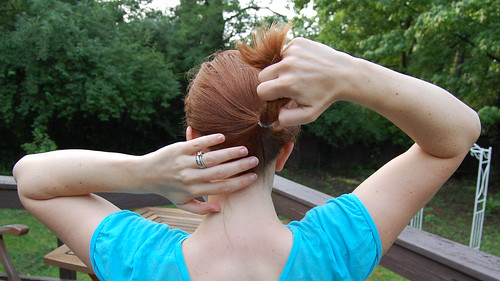
5. Twist ponytail up to create a roll of hair.


The elastic should no longer be visible; it is inside the roll.
I’m going to assume the first five steps are familiar. Who hasn’t done this and then secured the mess to their head with a claw clip? But claw clips, like scrunchies, are tacky. A stick is much classier.
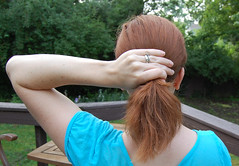
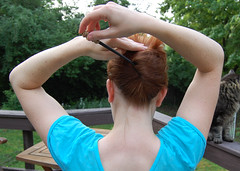
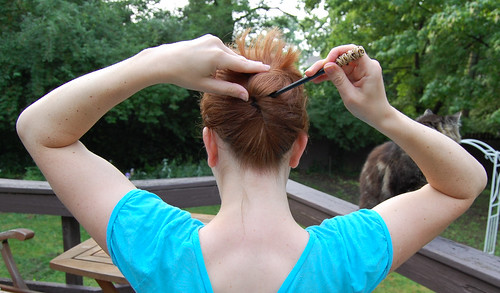
6. Insert the stick into the side of the roll. The positioning is key. The pointy end should be aimed somewhere between 8 and 11 o’clock as you look at this photo. It should also be at about a 45 degree angle to the head.
7. Slide the stick through the roll until it touches your scalp. It should exit the roll near the “crack.”

8. Here’s where the magic happens. Keep the pointy end against your scalp, and rotate the entire stick until you are now aiming between 2 and 5 o’clock. This will tighten the roll. Your stick will still be at a roughly 45 degree angle to your head, just flipped.
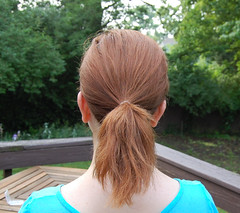
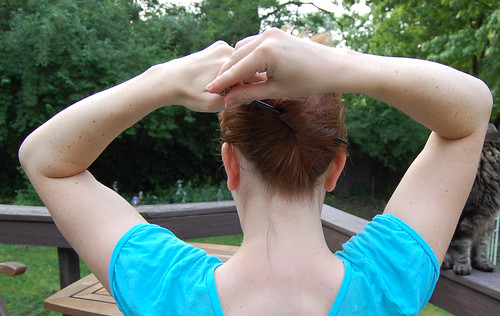
9. Slide the stick home. You’ll usually want an equal amount of exposed stick on either end, unless you have a large and decorative endcap.

10. Ta-da!
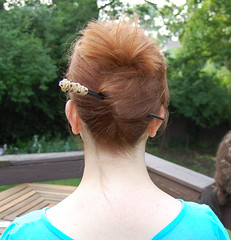
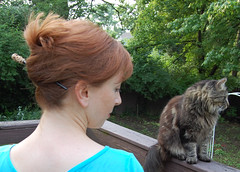
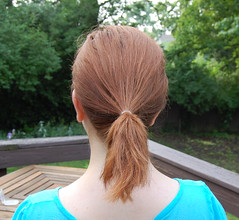
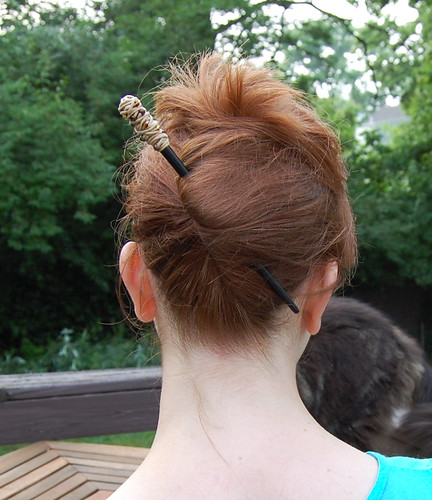
View from the back and the side (with Bear!)
 Usually, I like my updos to be a bit more bouffant than pictured above. Because I was taking photos (and letting go of the hair to press the remote button), the above roll ended up a bit looser and lower than I like. The photo to the left was taken after a second attempt at the lazy girl’s updo, with no pauses for photos. You can see that the roll is higher and tighter and that the stick is more vertical. (There is also more volume at the crown.)
Variations
A. Smooth. Leaving the ends loose only looks good with hair at about my length. Any longer, and you’ll want to tuck the loose bits inside.
B. Accessory-free. Hair pins can be used in place of the stick. If you use pins, insert them at a 90 degree angle to the head along the edge of the roll (left edge as you look at these photos), ensuring that one side of the pin’s prongs catches the hair in the roll. Rotate the pin to the left (as you look at these photos) ninety degrees. Push through the roll. You’ll need four or more pins. (This doesn’t look so much “lazy" as "chic!")
C. Super bouffant. Pull back the top bit of your hair and secure with an elastic. (I call this "the half-back.") Loosen the hair at the crown until the desired height is achieved. Follow steps 1 – 10 with the rest of your hair, being sure to cover the first elastic and any loose hair with the roll.
D. Banded. Add a headband to emphasize the pouf.
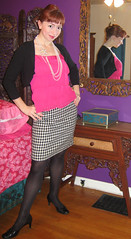
Lazy Girl’s Updo on WhatIWore2Day (click any photo to be taken to that outfit’s blog entry, often including additional pictures):

Yes, there are more examples, but I didn’t want to bore you to tears!
Materials:
- Shoulder-length or longer hair
- Hair elastic (I prefer the clear, ouch-less, plastic variety)
- Sharp, pointy stick (you can use sticks intended for hair, or pencils, paintbrushes, shish kabob skewers, etc)
1. Start with your hair down.
2. Pull it into a low ponytail.
3. Secure with an elastic.

4. Loosen the elastic so that there is slack between the elastic and your scalp.

5. Twist ponytail up to create a roll of hair.
The elastic should no longer be visible; it is inside the roll.
I’m going to assume the first five steps are familiar. Who hasn’t done this and then secured the mess to their head with a claw clip? But claw clips, like scrunchies, are tacky. A stick is much classier.
6. Insert the stick into the side of the roll. The positioning is key. The pointy end should be aimed somewhere between 8 and 11 o’clock as you look at this photo. It should also be at about a 45 degree angle to the head.

7. Slide the stick through the roll until it touches your scalp. It should exit the roll near the “crack.”
8. Here’s where the magic happens. Keep the pointy end against your scalp, and rotate the entire stick until you are now aiming between 2 and 5 o’clock. This will tighten the roll. Your stick will still be at a roughly 45 degree angle to your head, just flipped.

9. Slide the stick home. You’ll usually want an equal amount of exposed stick on either end, unless you have a large and decorative endcap.
10. Ta-da!


View from the back and the side (with Bear!)
 Usually, I like my updos to be a bit more bouffant than pictured above. Because I was taking photos (and letting go of the hair to press the remote button), the above roll ended up a bit looser and lower than I like. The photo to the left was taken after a second attempt at the lazy girl’s updo, with no pauses for photos. You can see that the roll is higher and tighter and that the stick is more vertical. (There is also more volume at the crown.)
Variations
A. Smooth. Leaving the ends loose only looks good with hair at about my length. Any longer, and you’ll want to tuck the loose bits inside.
B. Accessory-free. Hair pins can be used in place of the stick. If you use pins, insert them at a 90 degree angle to the head along the edge of the roll (left edge as you look at these photos), ensuring that one side of the pin’s prongs catches the hair in the roll. Rotate the pin to the left (as you look at these photos) ninety degrees. Push through the roll. You’ll need four or more pins. (This doesn’t look so much “lazy" as "chic!")
C. Super bouffant. Pull back the top bit of your hair and secure with an elastic. (I call this "the half-back.") Loosen the hair at the crown until the desired height is achieved. Follow steps 1 – 10 with the rest of your hair, being sure to cover the first elastic and any loose hair with the roll.
D. Banded. Add a headband to emphasize the pouf.
Lazy Girl’s Updo on WhatIWore2Day (click any photo to be taken to that outfit’s blog entry, often including additional pictures):
Yes, there are more examples, but I didn’t want to bore you to tears!
26 comments:
Yay! Thanks! Now I just have to practice enough to make it look halfway decent, hehe.
Holy moly that took a lot of time to take all those pics. I appreciate the illustration. This do is one that I have never been able to master.
How did you end up getting a remote for your camera? Was there a specific remote for your model? A "universal" type remote?
Thank you, thank you! The use of hair sticks has always been a mystery to me, and I really dislike those plastic "chip" clips. I can't wait to try this!
Nicole
THANK YOU! It was the rotate step that I always missed.
thanks! my aunty does this without tying her hair first...and i always wondered how she did it. thanks for taking pictures and retying your hair again and again. it's much appreciated. wanna guess what hairdo i'm going with to uni tomorrow? hehe =)
angie~*
First, I have to say a big thanks for this amazing post! Now, all I need to do is to read this post again, again and again to practise it!
You look chic and sweet! There are some warmness in the style as well... which is very classy!
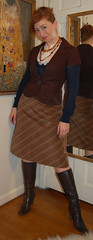
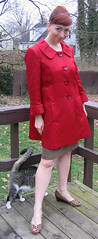
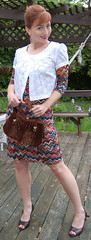
I love all these outfits! And in particular, I like the 3rd one (you look great in midnight navy and your mary-jane highlights the outfit), the 4th one (so adorable with the red coat and animal print peep-toe) and the 6th one (just a summer darling - the white jacket gives the sweet layering!)
I love that you do these photo-instructions. Thank you so, so much!
Thank you so much for this tutorial, K!!! Claw clips are tacky?!?!?! *gasp* I better learn this method quickly then, b/c that's what I've been using (pretty much every day)! Thanks for saving me from tackydom!
How funny - I wore my hair like this today. Except I don't put it in a pony-tail first. I just twist and stick in the stick! Today I am using a swizzle stick from American Airlines (-red plastic with a molded heart on the end). Maybe that's why I have been craving a vodka-tonic ALL day!
~Tessa
I also do this hairstyle but without a hair tie first.
I gather it into a low pony tail then I place the stick I'm using upside down to the left of the hair. I twist the hair around the stick, flick the stick right way up and slide it through my french roll at that angle. It usually stays in all day, although it's so easy to do I often end up using a pencil to tie my hair up if I've become sick of it in my face.
jessi - my old camera (Canon Powershot) wasn't remote compatible, but my new one, Nikon D40, is. I ordered the Nikon ML-L3 Wireless Remote.
all - you can do this hairstyle without the elastic band, but it is much more secure with!
kristal - I do something similar, but my hair is too short for that right now. :(
AWESOME! The elastic band! I have tried and tried without the elastic, but my hair is too fine to hold that style. It's amazing how the little things make such a difference.
update: my hair is just *a little* too short for this to work. Back to the tacky claw clips I go. : (
The front pieces fall out, but the cheesy clips seem to catch them. Tell me it's okay?
Thanks for posting this. I never used the elastic before, and it does make it much more secure. I could never figure out how other girls got their hair to stay and just assumed I was missing some sort of cute hair skill. That's probably still the case - ha! - but I can do this now.
linda - with shorter hair, I've found that bobby pins secure a roll better than a hair stick.
I wouldn't worry about the clips' "tackiness." I'll assume you aren't using a bright orange claw clip from the 1980's. (Yes, I still have one, bright orange, from the 80's, that my mom used when she cut our hair.)
i'm pretty sure the two stick version just uses an extra, non-functional stick stuck through at the opposing angle for flair.
Forgive me for being slow but I tried this like ten times last night, and it was almost always too loose unless I found some way to go through the elastic band. Is that how you do it? When you put the stick in first do you try to aim it to go through the elastic band that's concealed? Thanks for the help...love the blog!
dylanangel2001 - you shouldn't need to go through the elastic band. The trick is to insert the stick as shown on step 6 and then rotate it. As you rotate it, the point of the stick should scrape (not in a bad way!) across your scalp. This tightens the roll even further. Once you've rotated and then pushed the stick all the way through the roll, it cannot unroll because your head is in the way.
If you have really slippery hair, you might try a texturiser first.
the 2nd stick is functional - it can help stabilize the do if you have a lot of hair (mine is down to my waist & thick). i've always taken one stick & twirled it around & around until my hair was tight, then did that "in & rotate 180° to tighten" thing. this gives a pretty but very loose style though, & won't hold if i walk around. so thank you for the elastic idea! going to try that.
I'm still confused, I can't seem to get the hair roll right.
oh my god. i just stumbled upon this tutorial and have to say a big THANKYOU. i've had a pair of pretty chopsticks in my collection of accessories for years and never bothered to work out how to use them after the first couple of failed attempts. just tried it and it looks great! im not going to forget this one.
You could never bore your readers to tears ! This blog is ace !
Post a Comment