
My hair isn’t particularly long or thick, so when I want the look of a full hair bun, I use a bun form. Bun forms (also known as donuts or rats) can be made with a sock or a stocking, but I prefer a store-bought, nylon mesh form. Here’s how I use it:
I am using a Conair Bun Maker form
(This technique works well for short to medium length hair. If your hair is longer, check out some of the sock bun hair tutorials on youtube which instruct you to roll your hair around the form or to use the extra hair for a wrap-around braid. My hair isn't quite long enough for those iterations.)
I use the form with side buns:
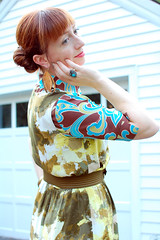

But employ my not-so-messy bun technique for buns on top of my head:

The form results in a denser bun, while the not-so-messy bun technique (essentially the same steps that I use with the form, only without the filler) looks more airy and casual.
Once complete, both buns can be tugged and adjusted to create a bigger and less regular look.
16 comments:
Reason 36 I wish we lived closer. Your hair tutorials change my life. For reals. You explain them in just the way they finally click for me.
I had to LOL at the "12, 3, 6, and 9" position references. My only friends who use that as a regular frame of reference are my military friends. :D
Thanks for the video. I actually bought some of those Goody Spin Pins a few months back for this reason and they just aren't working out for me like I want.......I think a bun form would work better, I had never realized they even existed!
I had no idea something like this even existed! Thanks, Kasmira! I might try this when my hair grows a bit longer! And you explain it all so well. :-)
I had heard of the word hair bun form but had not gotten the idea... now i do ! I need that form. I have little hair and think hair - i had always admired how FULL and thick the hairbuns looked. Now I know why ;)
This makes me wish I had more hair! Ah well, the growing out process continues. Lovely tutorial, looking forward to getting to use it.
Thanks! very helpful!
Great tutorial! I thought my only options for a perfect bun would be a sock (which my hair is not quite long enough for yet) or somehow mastering it freehand (yeah, not so much). I'm definitely going to give this a go with my curly hair!
OMG Kasmira, I have layered hair and my buns look so lame! Now I know what to do, get a form and pins! Can't wait to try, I learned how to use chopsticks (for hair, not food!) from you. I know this is the answer for my bun problem. I want tight, neat buns!
Thanks Kasmira for that tutorial. I've ordered a bun form today so that I can try this out.
Kasmira,
I love your blog and visit every day. Your fashion sense is great! You sure did a great job on the tutorial!
Thanks!
Larissa
I tried it today and it worked perfectly, on the first try, in the school carpool lane waiting for the kiddies!Thanks!
Whoa, awesome! I've heard of the sock bun, but didn't know they actually made bun forms - I must find one!
By the way, you are such a natural in front of the camera - no wonder you're an actress! :)
My hairs not quite long enough to work with the bun form but swirling it round and pinning it in place with a few strands loose at the front has worked and got me some nice comments and looks smart for work.
I am so getting one of these!! Off to Walgreens!
I finally managed to get a bun form small enough to use with my hair length so tried out your technique with it today and was really happy with the look.
Thanks for the tutorial! I was so confused after I bought the bun form. Googled it and you came up
Post a Comment